
Create and save a View
Customizing columns, filters, and sorting in the List View only lasts for your session. Saving that setup as a View makes it persist so you — and optionally your team — can reapply it in one click.
Saving works the same in 8.3 and 8.4. The only difference is where you open the views selector.
Open the views selector
- 8.3 — In List View, open the combo box at the top of the document.
- 8.4 — Click the Views icon in the Navigation Panel.
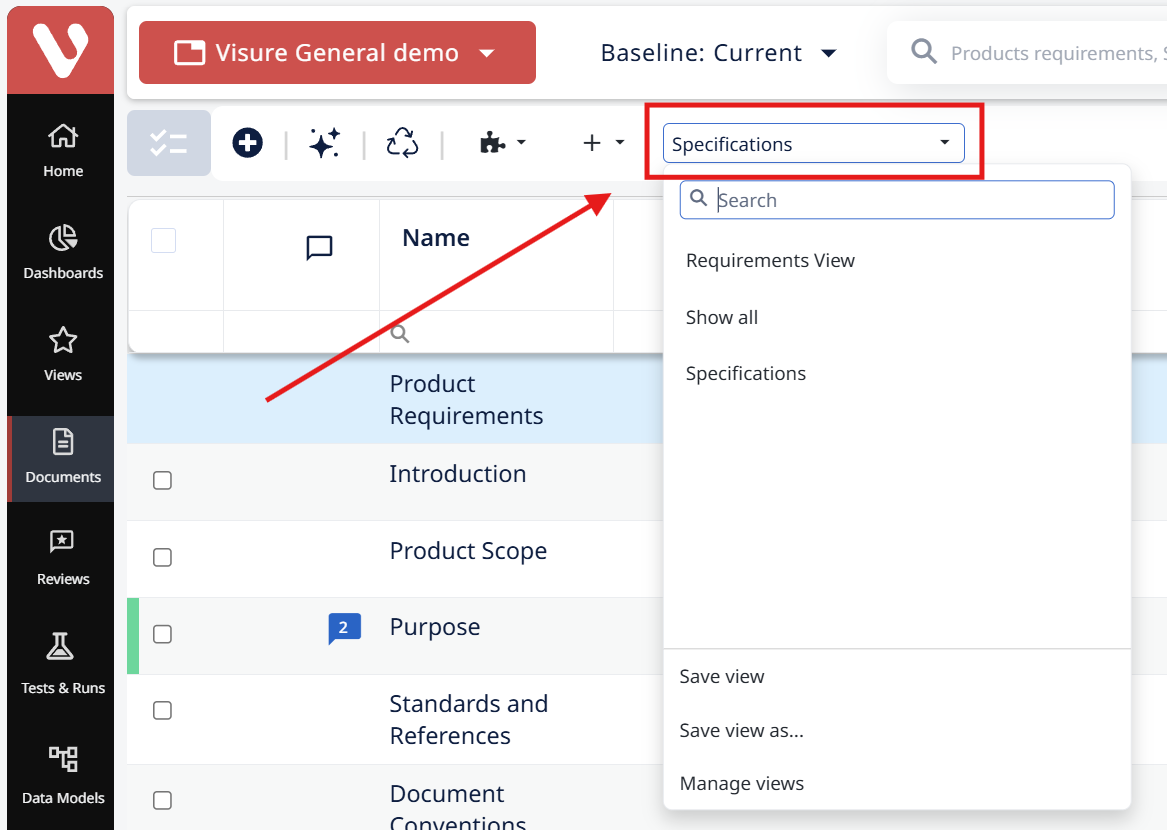
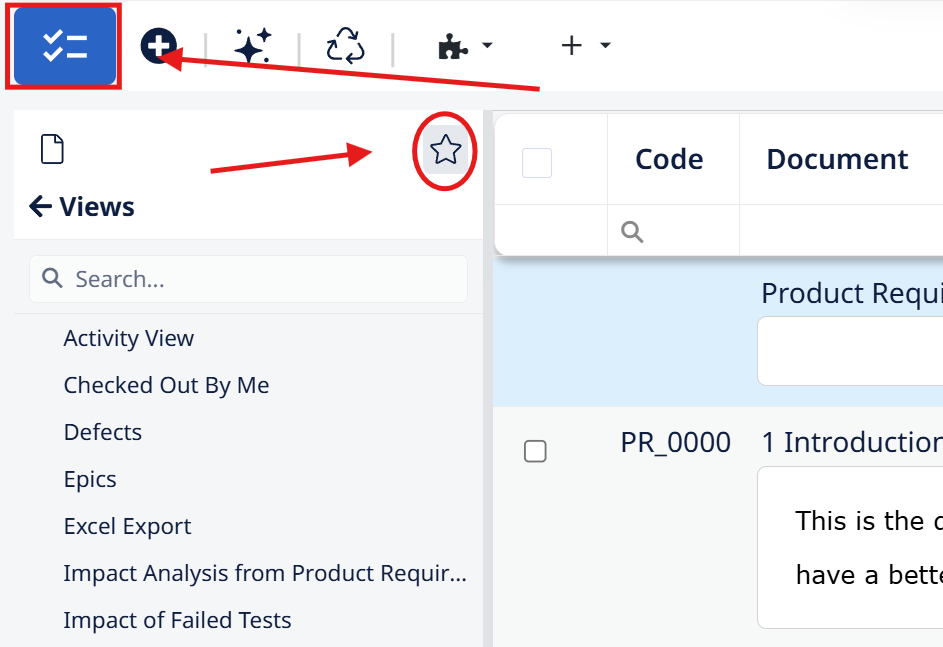
Save a View
- Open a document in List View and set up your columns, filters, and sorting.
- Open the views selector (see above for your version).
- Click Save view as….
- Set Use View as default for:
- None — applied only when you select it manually.
- A document — applied every time that document is opened.
- A folder — applied to every document in that folder that doesn't already have its own View.
- All — applied to any document that has no View of its own.
- If you chose None or All, enter a Name and optional Description.
- Optionally enable Share view to make it available to other user groups (read-only).
- Save.
To update a View you already saved, use Save view (without "as…") — it overwrites the current View with your latest columns, filters, and sorting.
How a View becomes the default: the link between a View and a document is its name. When you set Use View as default for a document or folder, Visure instantly renames the View to match it — that matching name is what makes it the default. If you later rename the View so it no longer matches, it stops being the default and goes back to manual selection.
Manage saved Views
To edit, duplicate, or delete a saved View, go to the Views area of the Elements Panel (Manage Views in List View takes you there). Note that in 8.3 is the views section,