Import from Excel
Excel import is the best tool for a round-trip workflow: export your items from Visure to Excel, edit them offline (in bulk, with people who don't use Visure), then import the file back to update the project. Because Excel maps naturally onto Visure — one row per item, one column per attribute — the trip out and back is clean, and Visure detects exactly what changed.
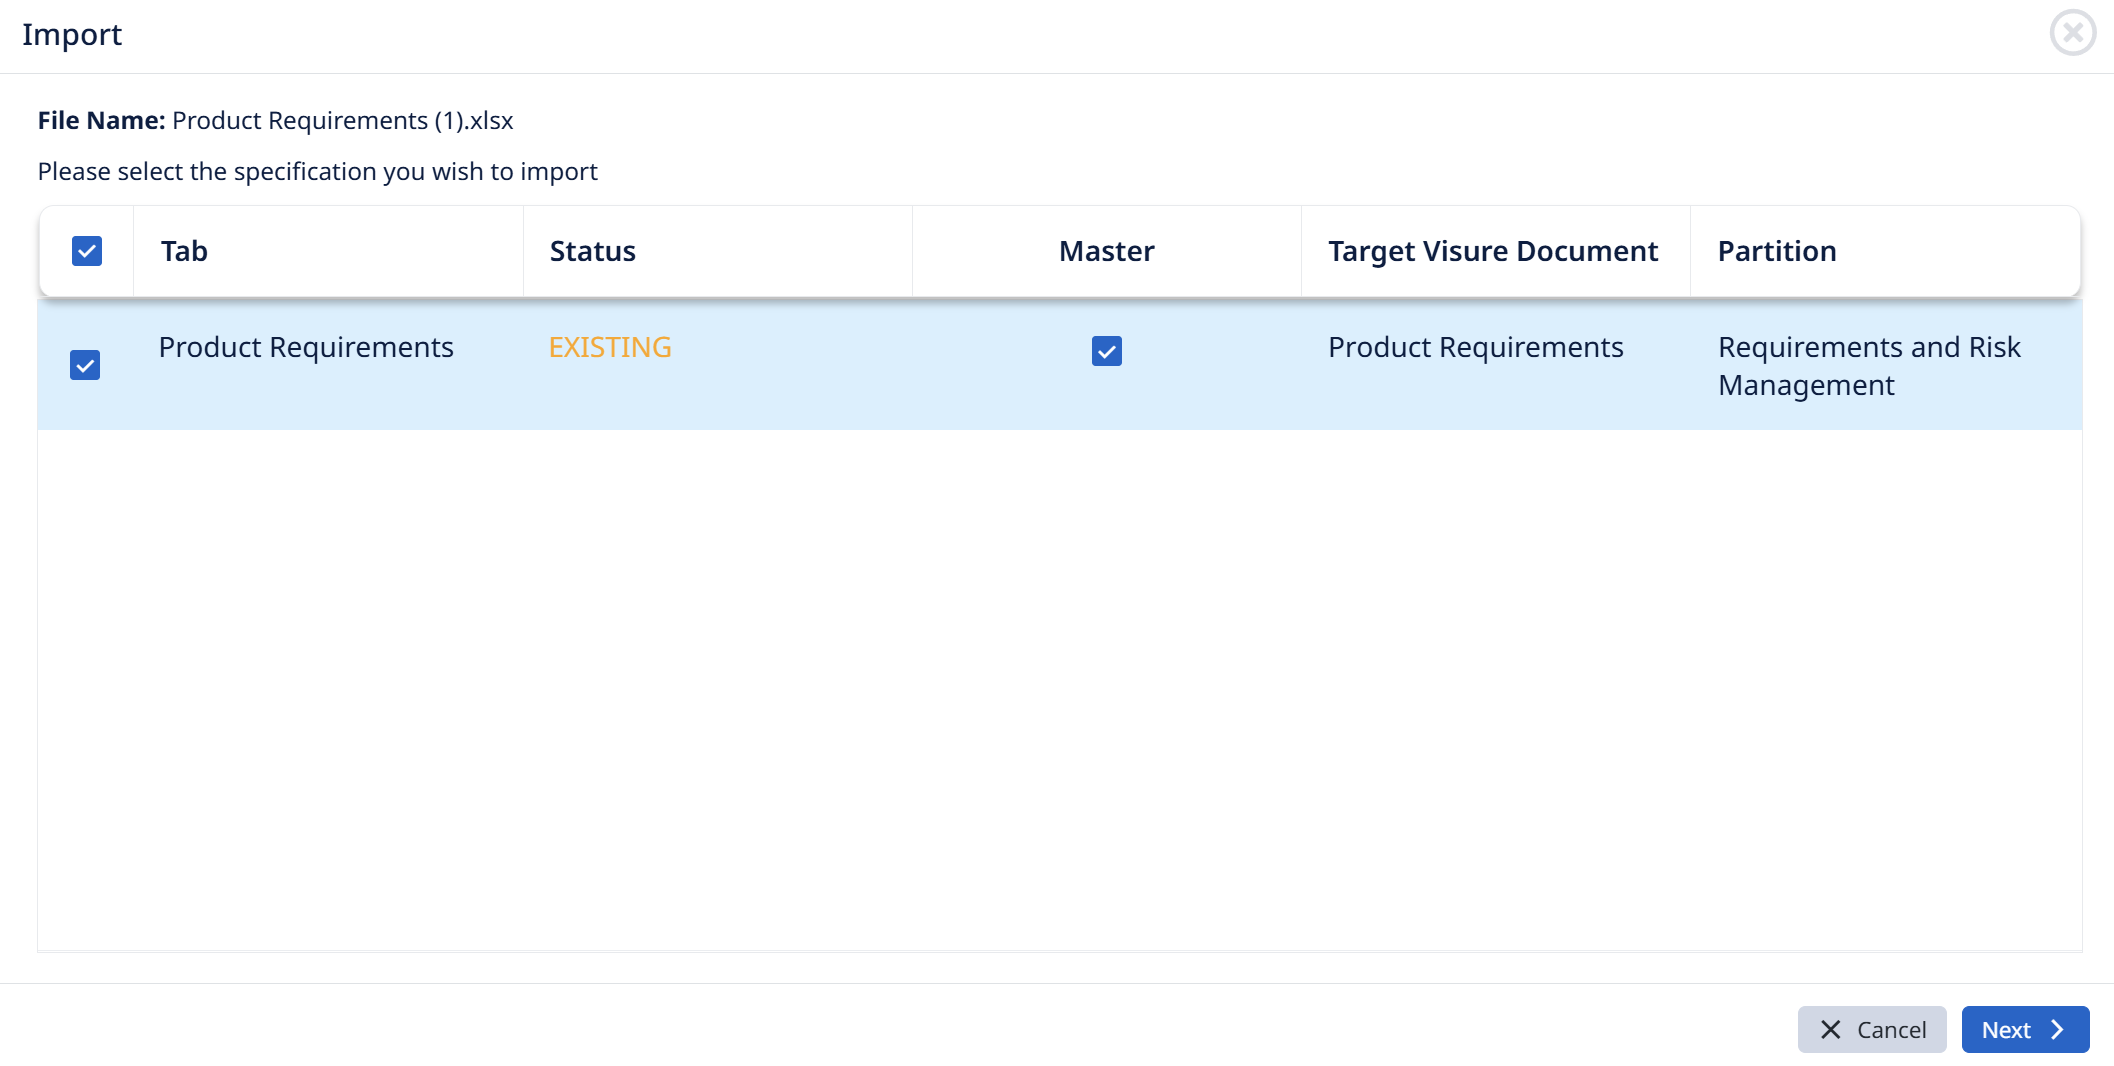
Select the sheets to import
If the Excel file has more than one sheet, Visure opens a selection screen first ("Please select the specification you wish to import"). Each sheet appears as a row where you set:
- Tab — the sheet name in the file.
- Status — whether it matches an EXISTING Visure document or will be NEW.
- Master — flags the master specification for the import.
- Target Visure Document — which document the sheet imports into.
- Partition — the access partition for the items.
Check the sheets you want to import, set their target document and partition, and click Next. (A single-sheet file skips straight to the preview.)
Start the import
- Click Import at the top right of the Documents view and choose Import from Excel.
- Select the file (local files or Google Sheets).
The wizard opens with three steps: preview, mapping, and import.
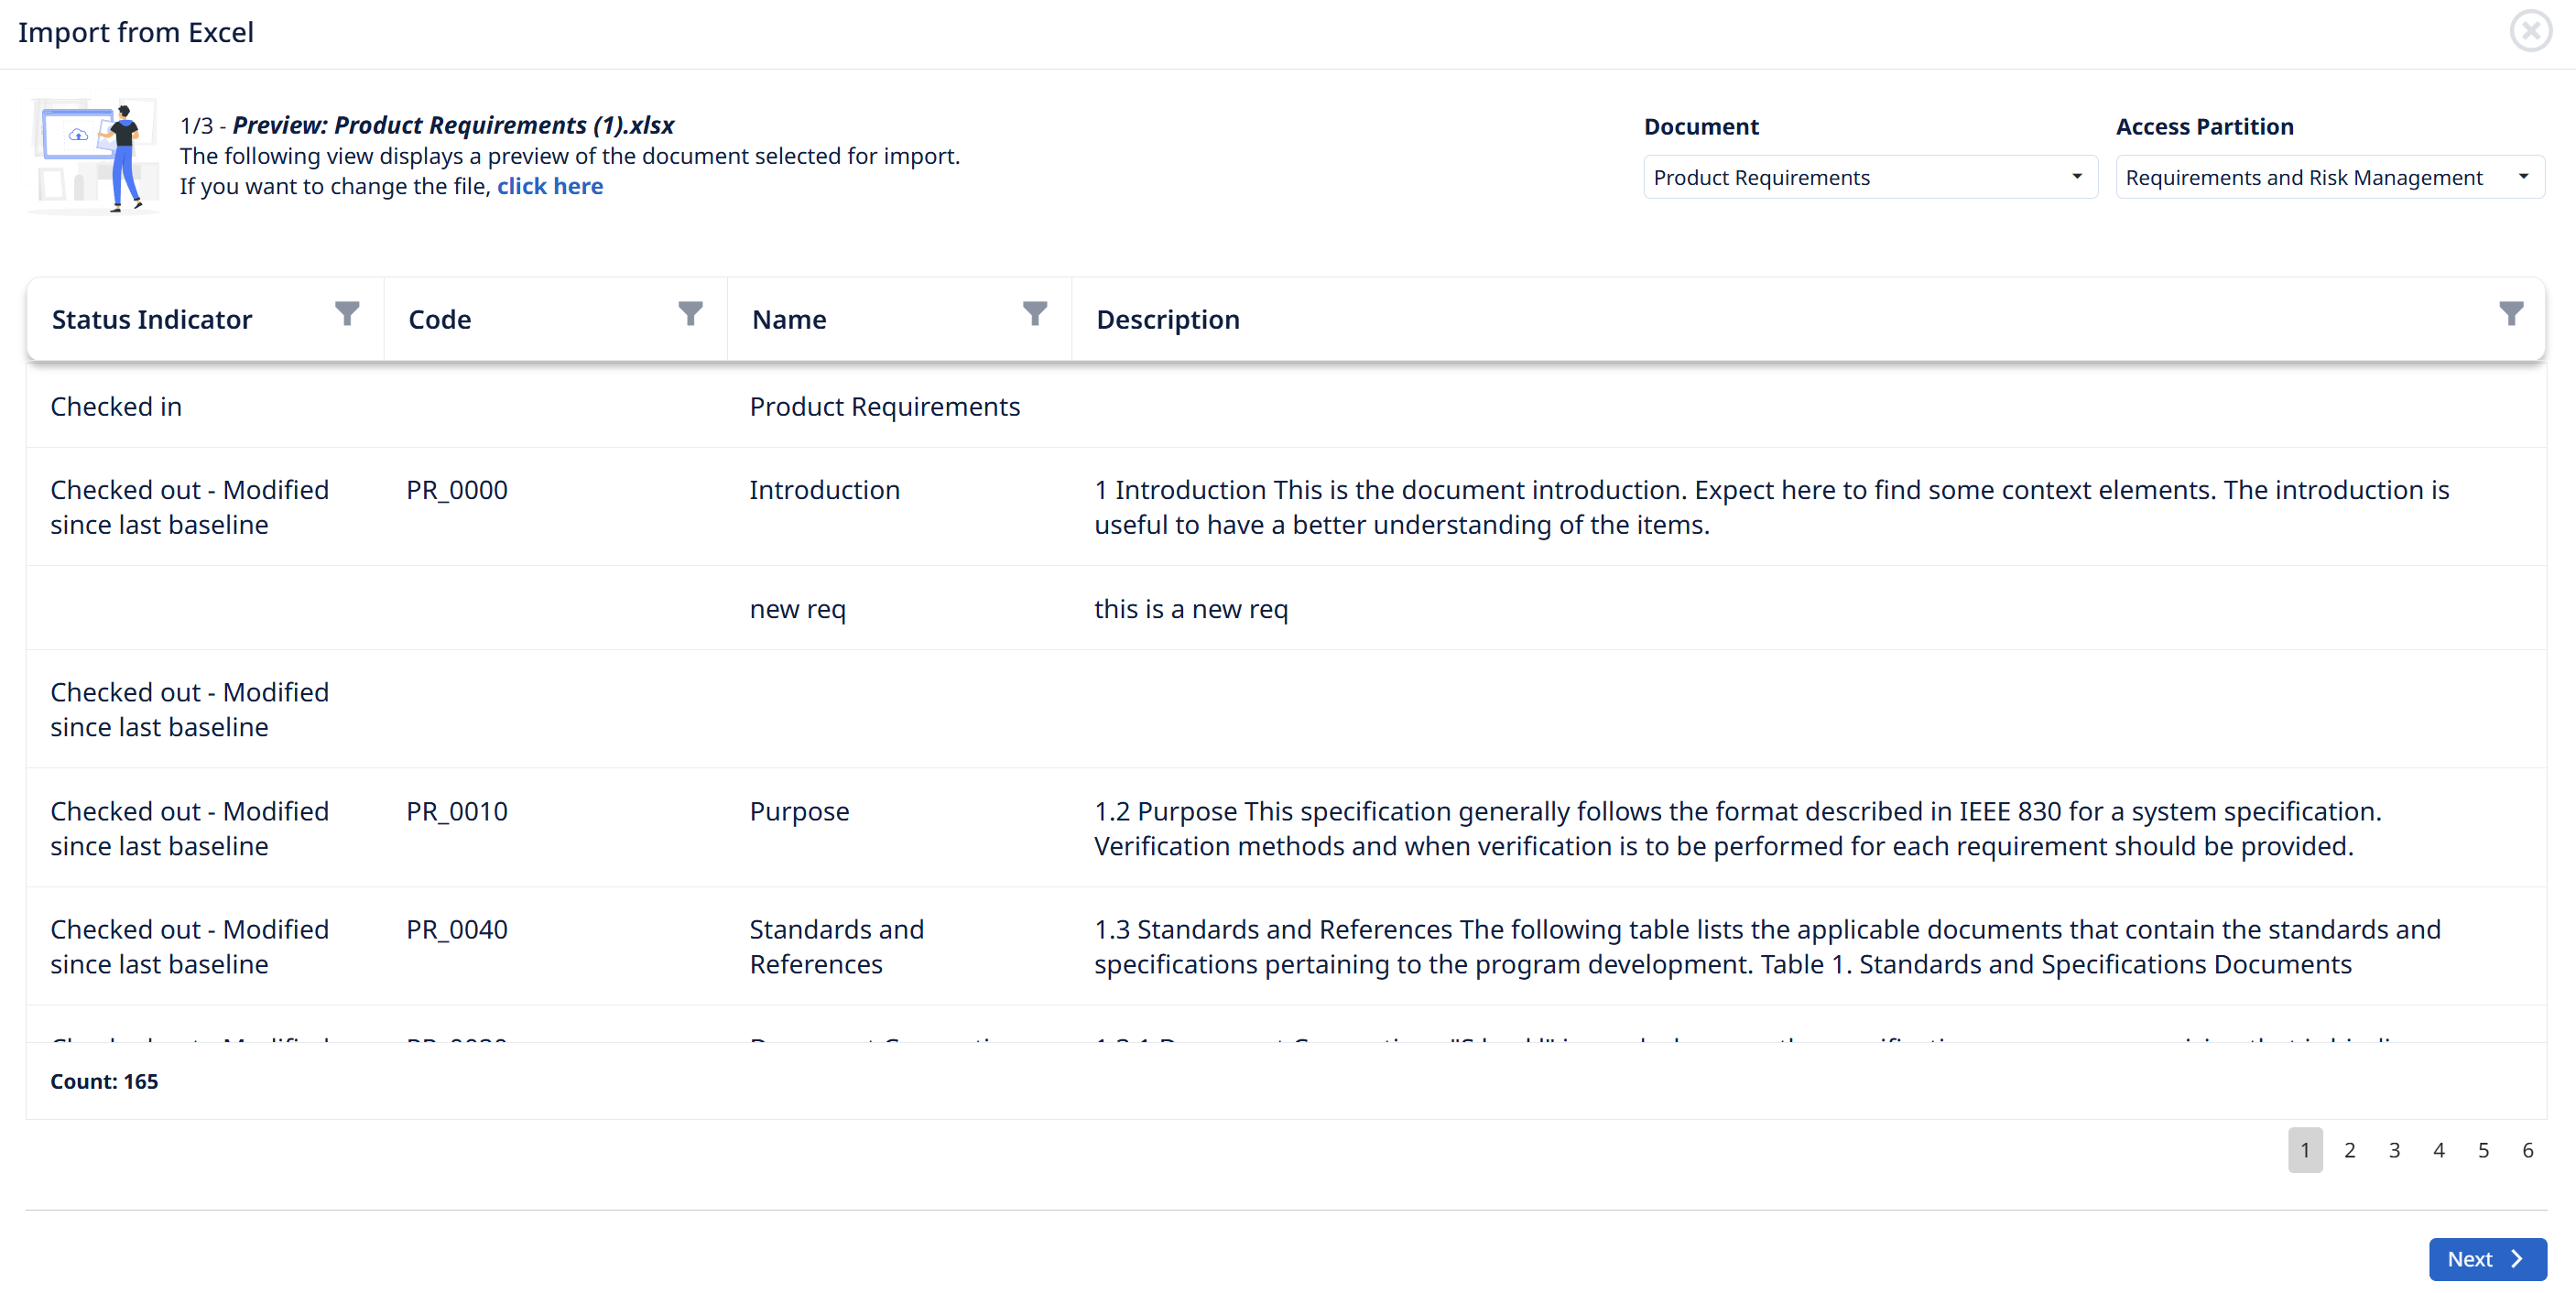
1/3 — Preview
Visure shows what it captured from the spreadsheet — the rows as items, with their columns. Use this step to confirm the content looks right, then set:
- Document — the destination. Pick an existing document to update it, or create a new one.
- Access Partition — the access rights for any new items.
Use click here at the top if you picked the wrong file and want to swap it.
2/3 — Column mapping
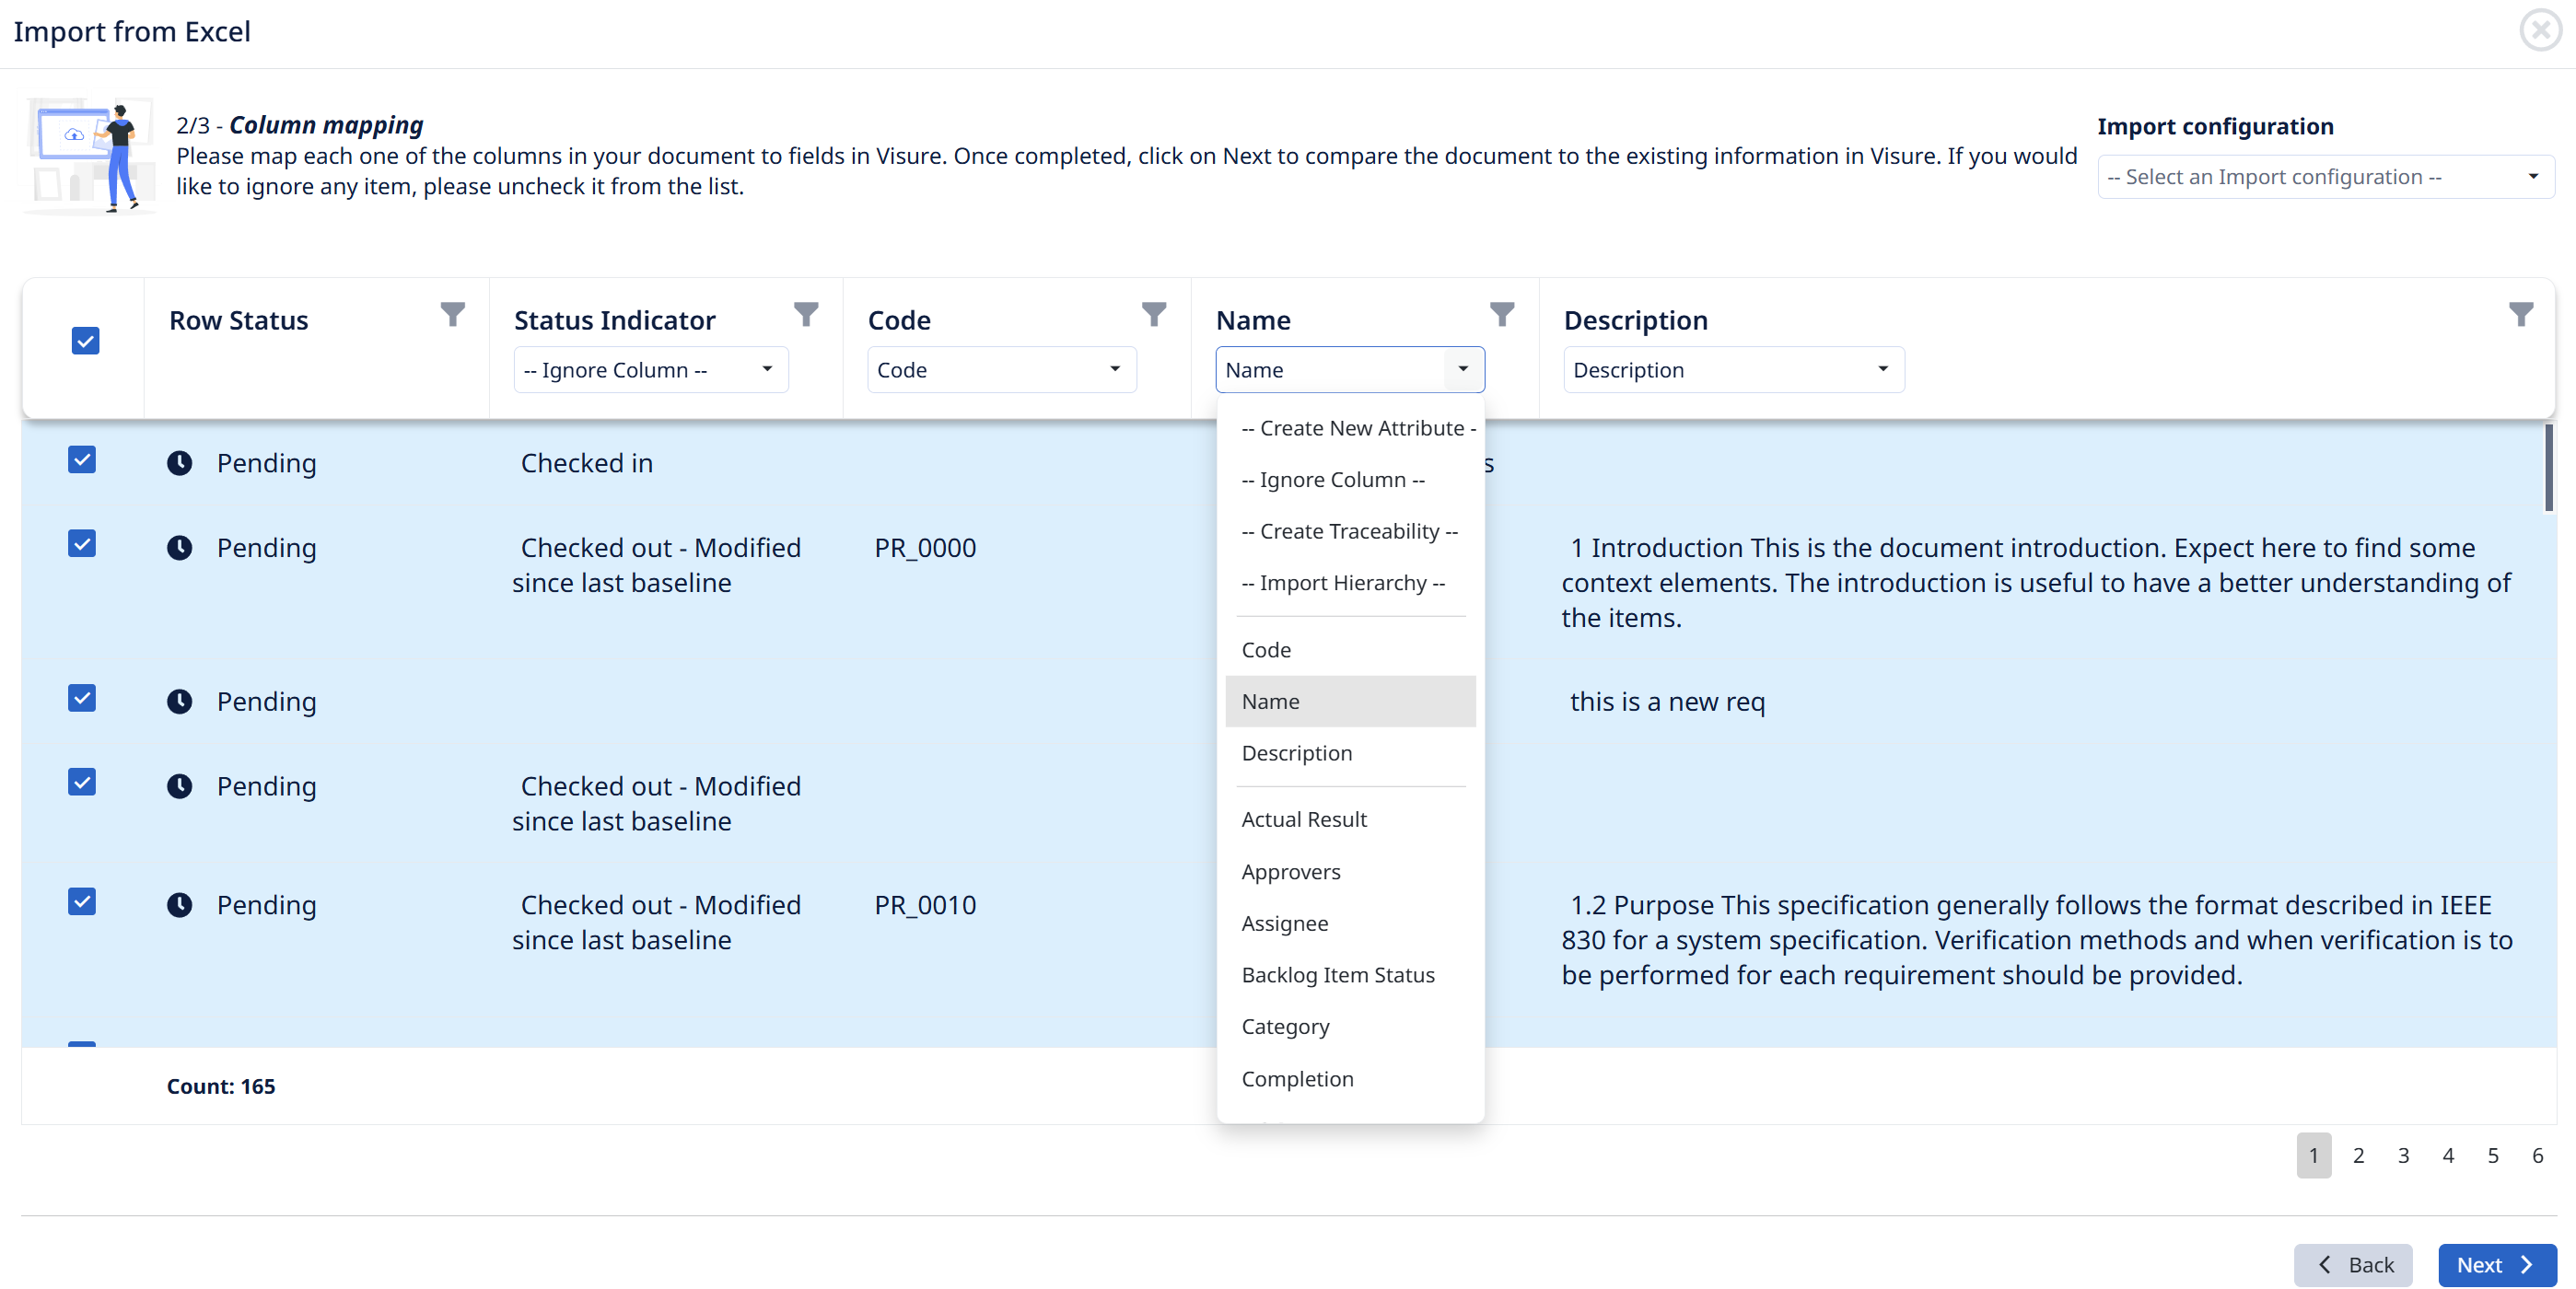
Map each spreadsheet column to a Visure field. By default a column maps to an attribute with the same name; open a column's dropdown to change it — map to an existing attribute, or choose Create New Attribute, Ignore Column, Create Traceability, or Import Hierarchy. Uncheck any row you don't want to import.
Round-trip tip: a file exported from Visure includes helper columns like Status Indicator that you don't want back in the project. Set those to Ignore Column. Keep the Code column mapped — it's what links each row to its original item.
3/3 — Import items
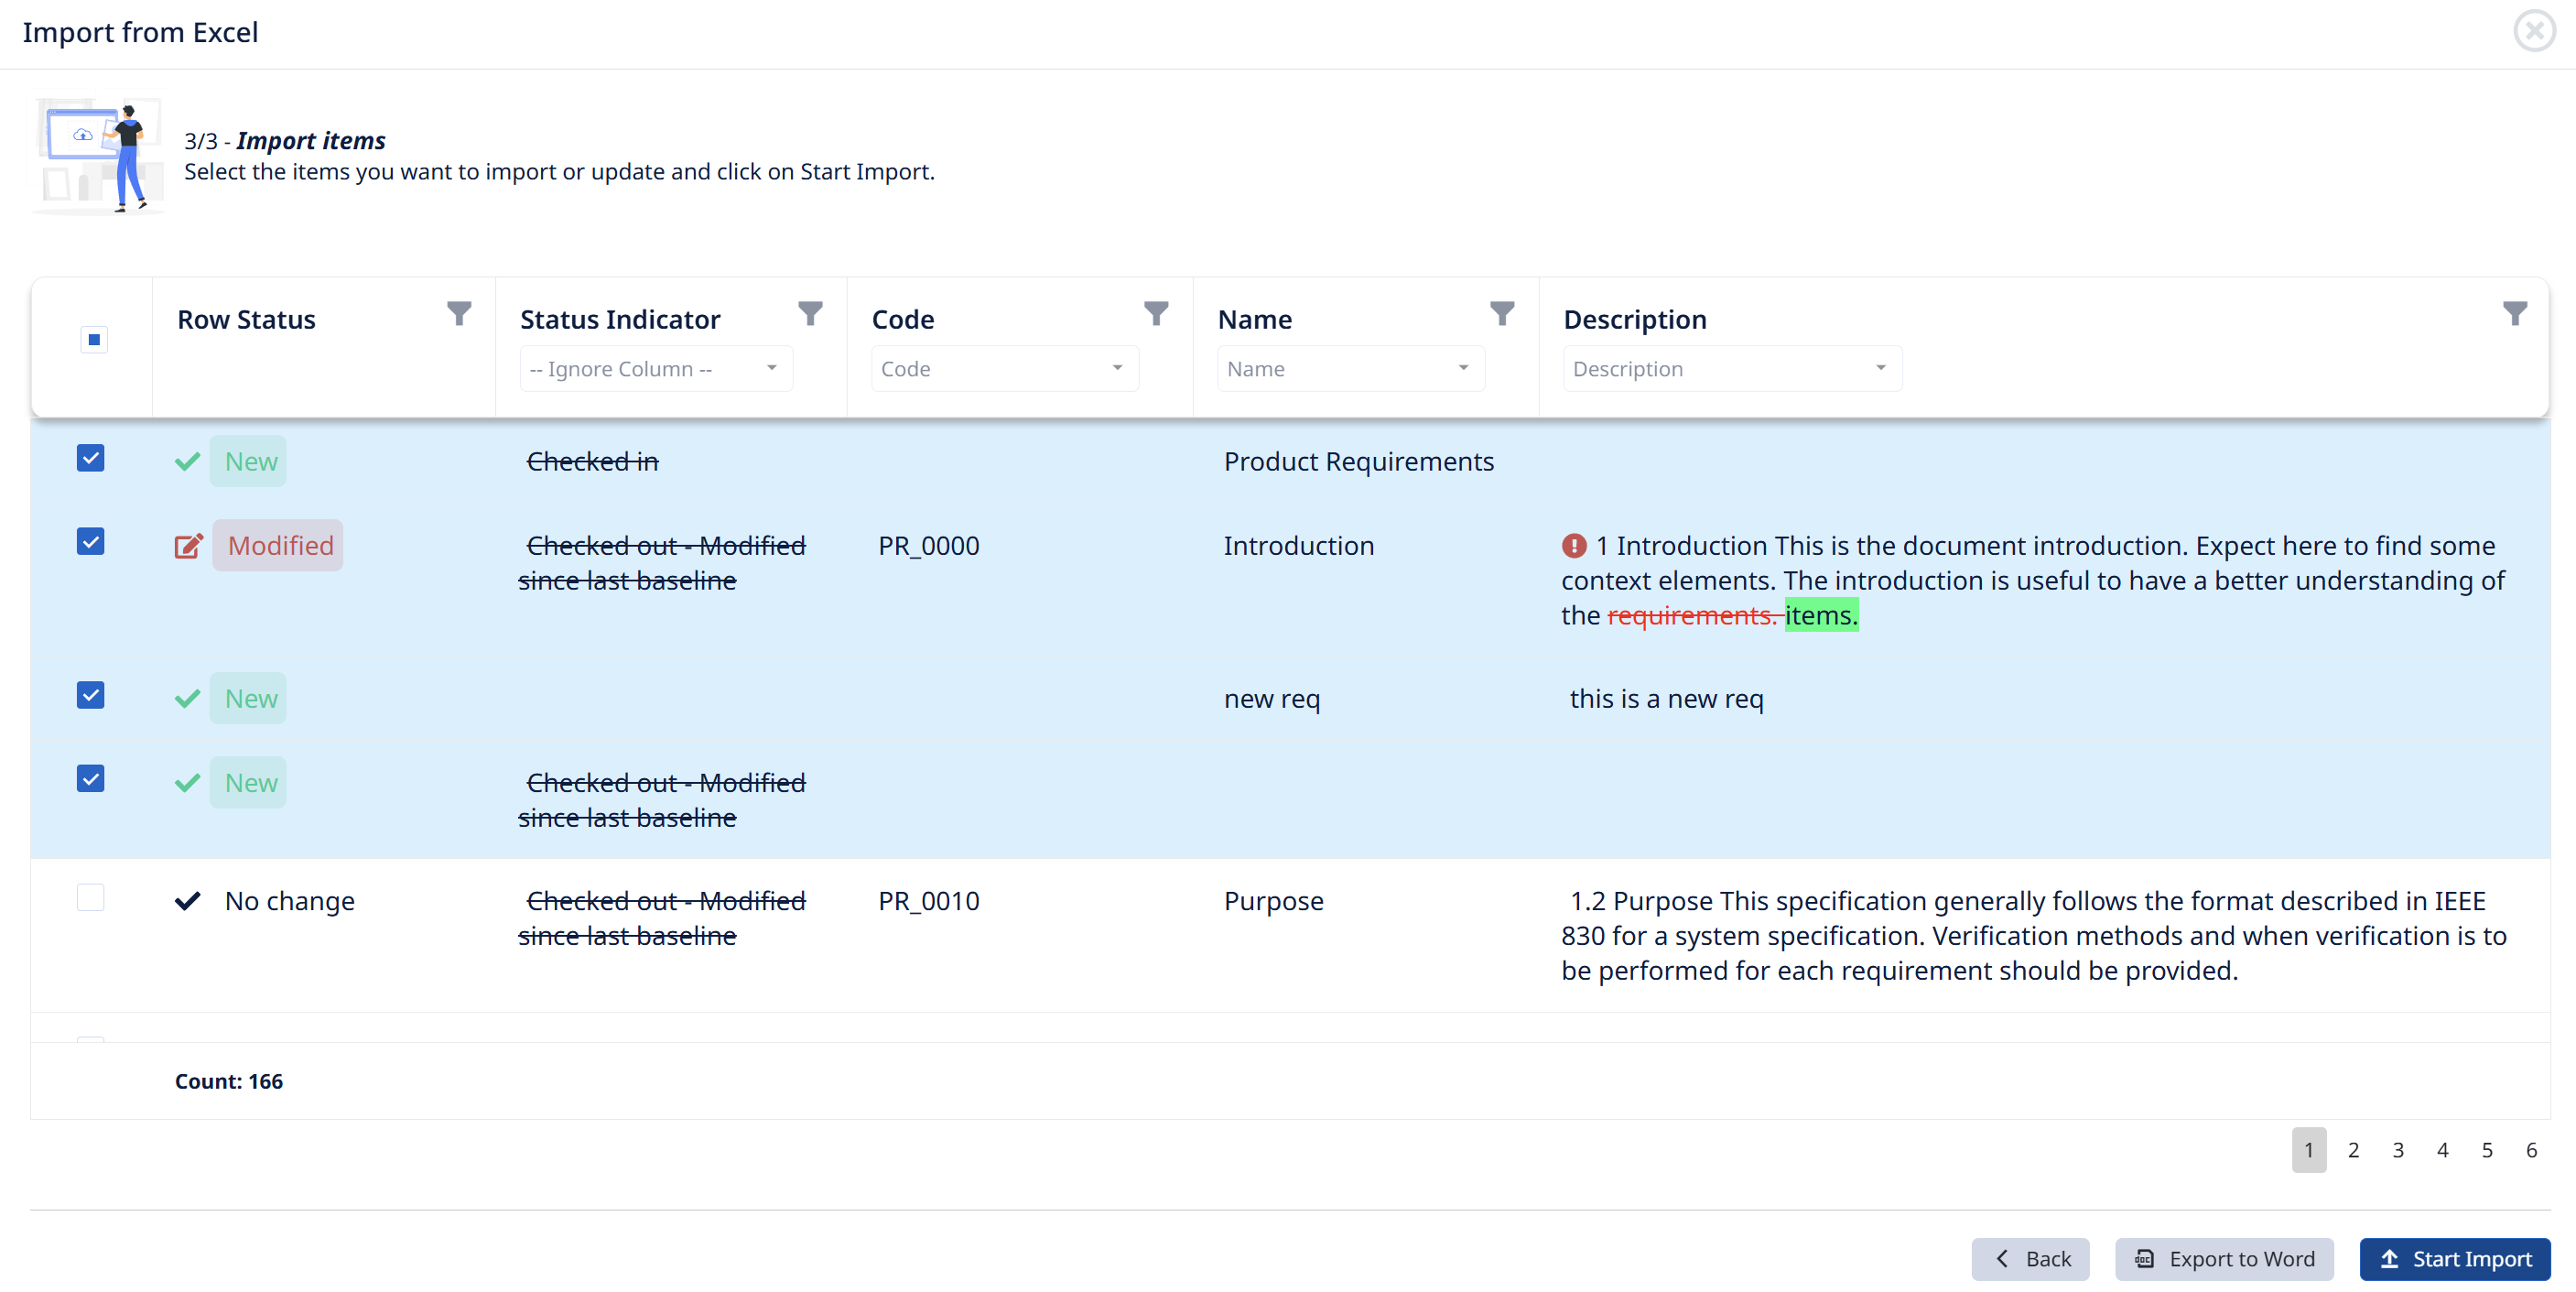
Visure compares the file against the project — matching on Code — and shows each item's Row Status:
- New — not yet in Visure.
- Modified — exists, but a field changed. The change is shown inline: removed text struck through in red, added text highlighted green.
- No change — identical to what's already there (left unchecked by default).
- Deleted — in Visure but not in the file (only removed if you check it).
Because matching is by Code, keep the Code column intact when editing in Excel — that's what makes your edits land as updates to the right items rather than duplicates.
Click Export to Word if you want a record of the comparison. Then select the items to import or update and click Start Import. The import runs in the background and notifies you when it's done.