
Step-by-step approach to getting started
This guide offers new users a step-by-step approach to getting started with Visure exploring essential features. Learn how to navigate the tool, create requirements, establish traceability to optimize your workflow from day one.
Step 1: Discover what's inside your Project
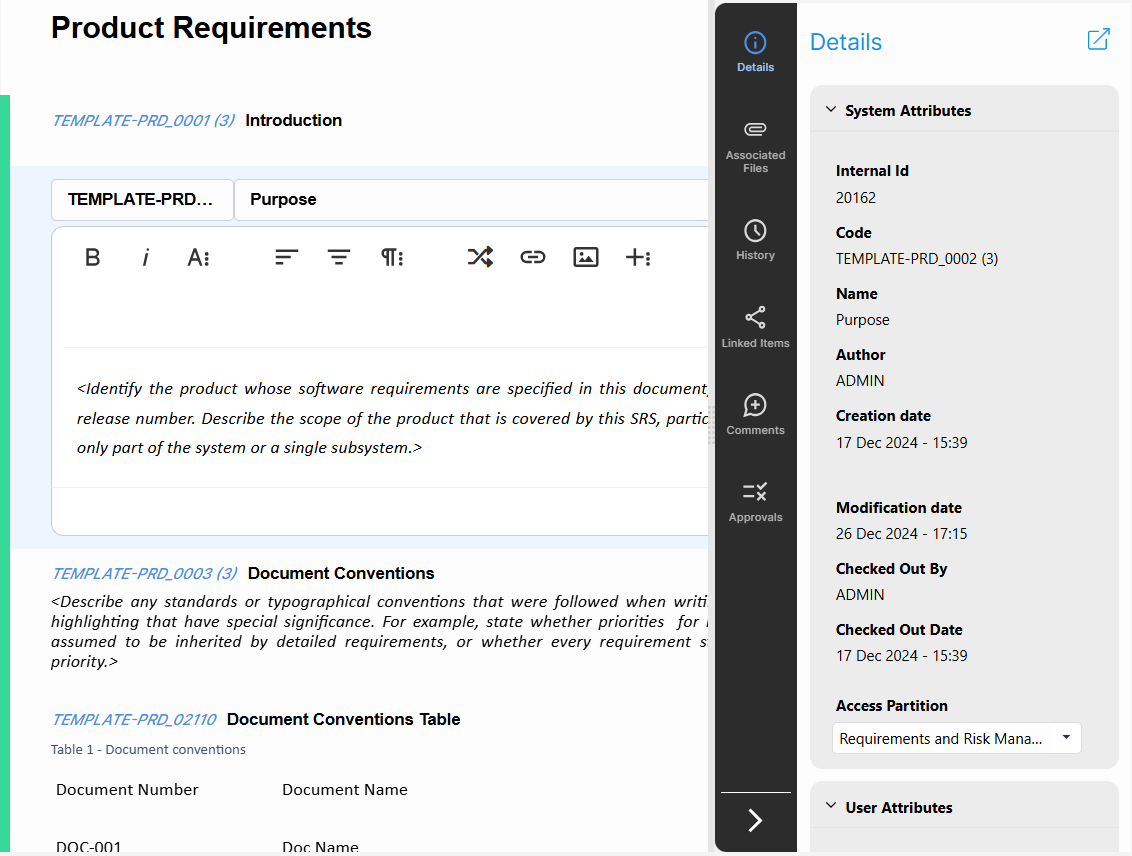
Navigate to the documents section:
- Where all your documents are located. Open your Product Requirements and explore the ribbon. Elements are clickable and have details! click on of the requirements and access to see details using the right panel
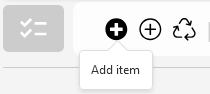
Add Requirements/Items/test Cases/etc:
- Find in the Ribbon Bar the Add Item icon. Create a few sample requirements, such as “Requirement A,” “Requirement B,” etc.
- Fill in basic details for each requirement, like priority or status, and leave more complex fields for later.
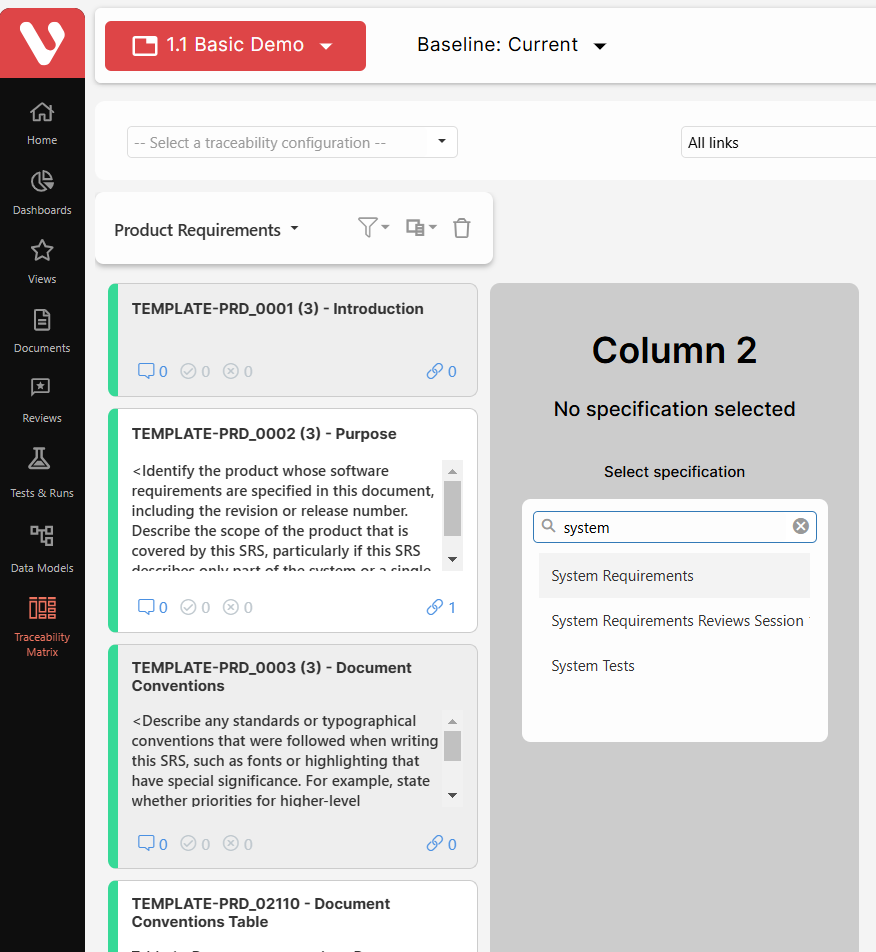
Explore Linking:
- Select a requirement on the Product Requirements document, right-click, and choose Start Link.
- Select a second requirement on the System Requirement document and choose End Link. This will create a traceability link between them, helping you visualize dependencies.
- Navigate to the Linked Items button on the right side panel to see how items are linked together
Step 2: Familiarize Yourself with the Traceability Matrix
Open the Traceability Matrix:
- Look for the Traceability Matrix option in the left toolbar and create a new traceability matrix:

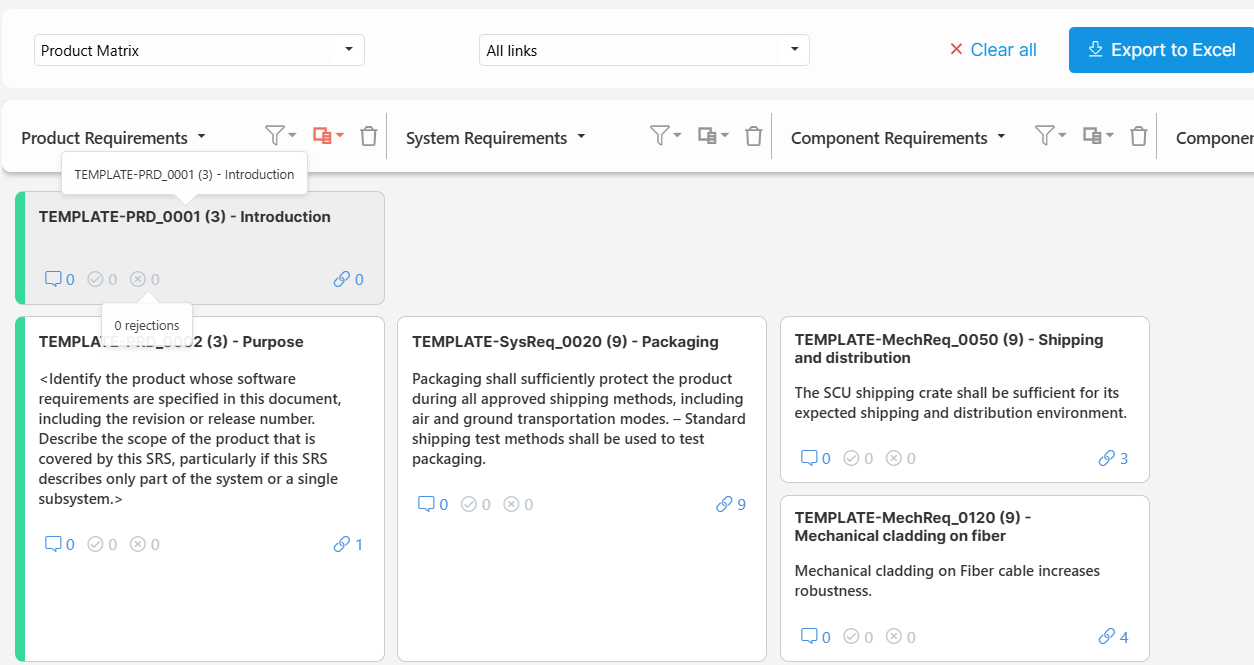
- Select the documents you want to include in your report, for this example select in this order Product Requirements - System Requirementes - Component Requirements.
Explore the Matrix Layout:
- The traceability matrix will display your requirements on one axis and other linked items (like test cases or tasks) on the other. When you create a Traceability Matrix Report, you have to select the documents you want to include. If the items within those Documents contain traceability between them, the report will show it similar like this:
- Review the connections you created in Step 2 to see how requirements are linked and represented in the matrix.
- To learn how your documents are traced, you can review your Data Models:
- The Data Model will show you the possible relationships that can be done between the elements contained within those documents. This means, all boxes are actually Folders or Documents which you can click and that will take you to the Folder/Document.
Analyze Traceability Relationships:
- Try adding or removing links between items and refresh the matrix to see how the traceability map changes.
- This helps in understanding impact analysis, as you’ll see which elements are dependent on each other.
Step 3: Review the Document Panel
Access the Document Panel:
- From the project view, open the Document Panel. This is usually accessible via a tab in your project workspace.
Explore Document Options:
- You’ll see options to Import Documents and Create New Documents.
- Try creating a new document, and add a few requirements directly within the document to see how items are organized.
Navigate the Document Structure:
- Familiarize yourself with the different columns and data displayed, like requirement name, status, or priority.
- You can click on each requirement to view or edit details, as well as filter or sort requirements for a better overview.
Step 4: Experiment with Baselines and Versions
Create a Baseline:
- In your project, go to the Baseline section at the top and select Create New Baseline.

- Choose the requirements or items to include in the baseline. Name the baseline and, if relevant, add a description (e.g., “Initial Version”).
Explore Baseline Options:
- Once created, a baseline locks the current state of requirements. Click on the baseline to view its version history and see what changes have been made since.
- Explore options for Baseline Comparison to understand how changes are tracked over time.
Use Approval Workflow:
- Some baselines may require formal approval. Set up an approval workflow by selecting team members for review, and assign requirements for them to approve or comment on.
- This helps you practice managing requirements versions and approvals, crucial for regulated projects.