
Custom Attributes
The custom attributes section allows project managers to manage user attributes. To access the user attributes management, click on the settings wheel and select Custom Attributes.

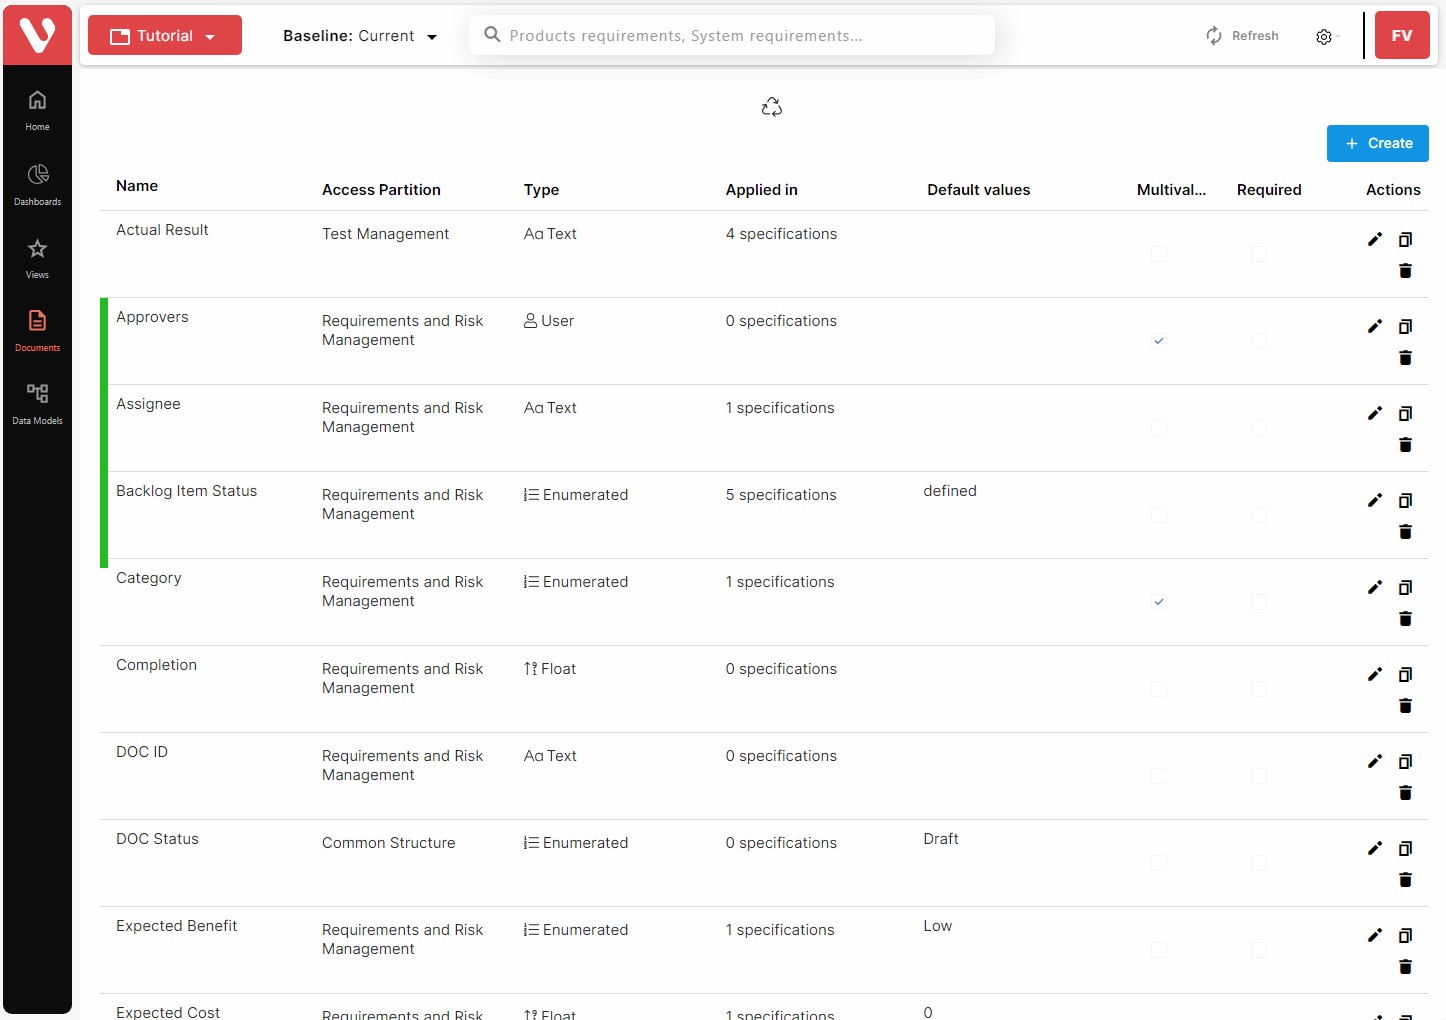
Attributes will be displayed as columns in your document when using the List View. You can customize your documents with your attributes an create reports by saving Views. Create as many attributes as you need, then open a document and your custom attributes will appear under the Show Column selector Icon 

Visure Authoring will display the complete list of attributes with information on the type, access partition, scope, default values and other information:
Creating attributes
To create a new user attribute, click on the Create button. This will open the New Attribute wizard:
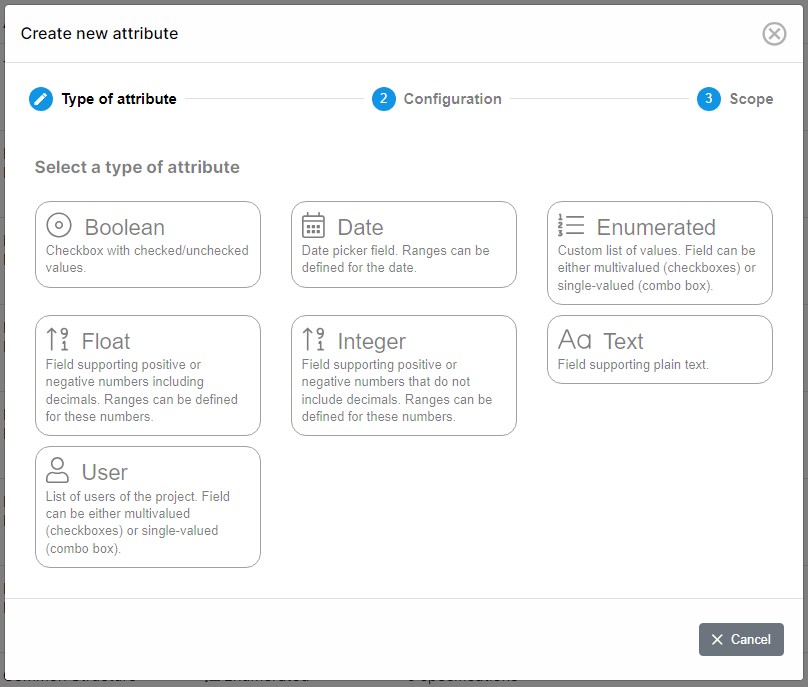
In this wizard, the user needs to follow three steps:
- Type selection – The users can select from a wide variety of attribute types, from text, date, boolean, user or enumerated.
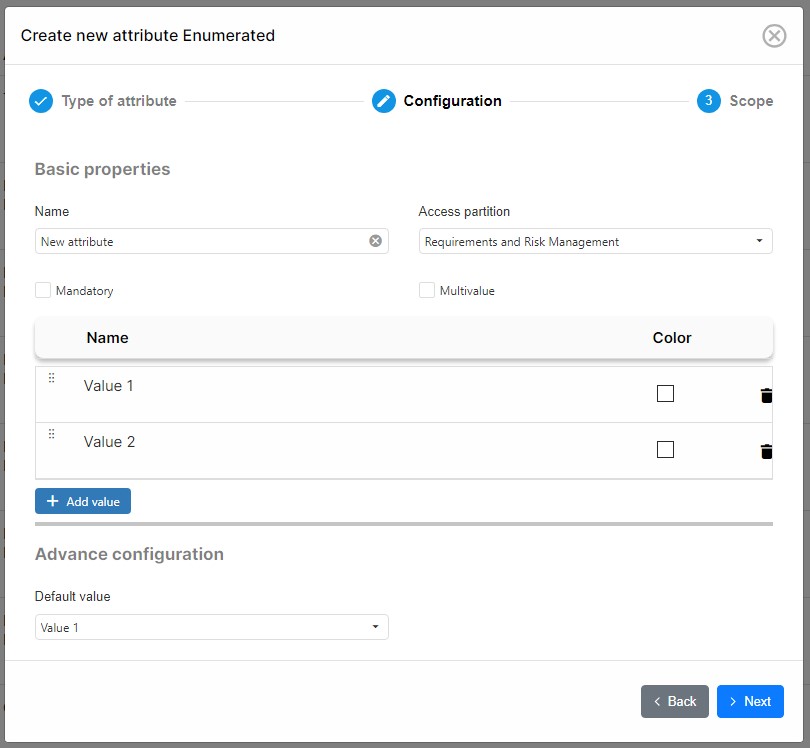
- Depending on the type selected, the user will have to configure the attribute defining:
- Name
- Access Partition
- Mandatory – In the case of selecting mandatory, the attribute may not be checked in until a value has been explicitly selected by the user.
- Multivalued.
- Range, values, etc. depending on the type.
- Default value.
- Scope. In this step, the user will be able to select between:
- Set attribute as a property for all documents in the project (does not apply to the items inside them) – The attribute applies only to the documents themselves, but not to the items inside them e.g. DOC number, Release, etc.
- Apply attribute to all items in the project – The attribute applies to all items, but not to the documents.
- Apply attribute to all items inside the selected documents – The user can select the documents it applies to. The attribute will apply only to the items in these documents.

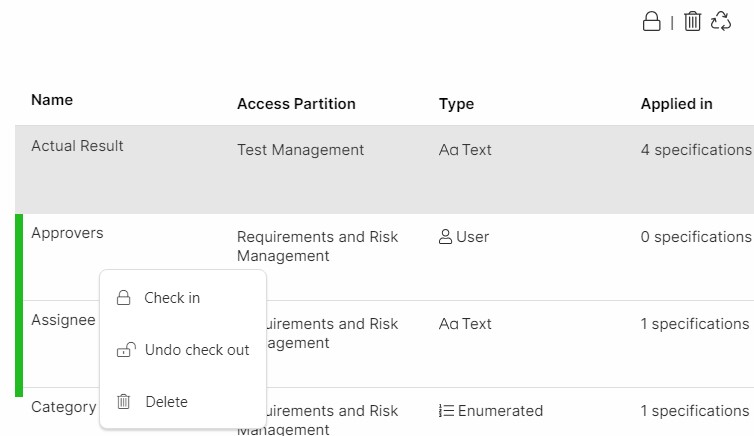
Checking in/out attributes
Attributes can be checked in and out, like any other element in Visure. These options will appear at the top of the screen, as well as in the context menu when right-clicking on top of the attributes.
Editing attributes
The edit attribute option can be accessed by clicking on the edit attribute button (
Duplicating attributes
Attributes can be duplicated by clicking on the duplicate icon (
Deleting attributes
Attributes can be deleting by clicking on the delete icon (
Restoring attributes
Deleted attributes are sent to the recycle bin, which can be accessed by clicking on the Restore deleted items icon (