Create a New Project
Only the ADMIN user and Super Administrators can create new projects. Project Administrators will only be able to manage the projects they are assigned to as administrators but will not be able to create new ones.
In order to create a project, click on Settings at the bottom left corner 

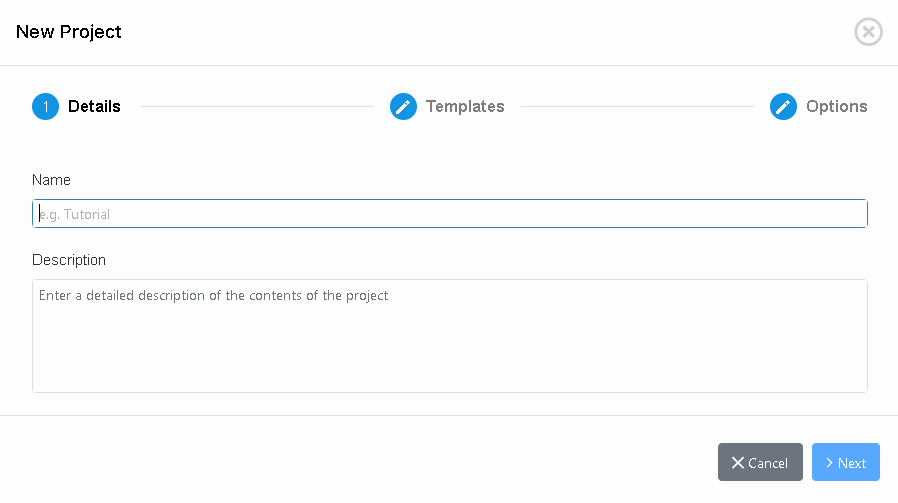
Step 1: Enter project details
In this first step, you are required to enter a new name and a description for the new project. Names have to be unique and cannot be reused. Please note that it will not be possible to use the same name for a deleted project that still exists in the recycle bin. If you would like to use the same name, first permanently destroy the project, or restore the deleted project and change the name.
Click on > Next.
Step 2: Select project template
In this step, you will be able to select any of the existing project templates to create your new project.
Templates are previous projects that have been selected to become the starting point of another project, hence, they contain everything that a project can contain, such as items, attributes, workflows, data models, link types and even filters and views. Some project templates may even contain users!
Select the template that best fits the description of the project that you want to create and click on > Next.
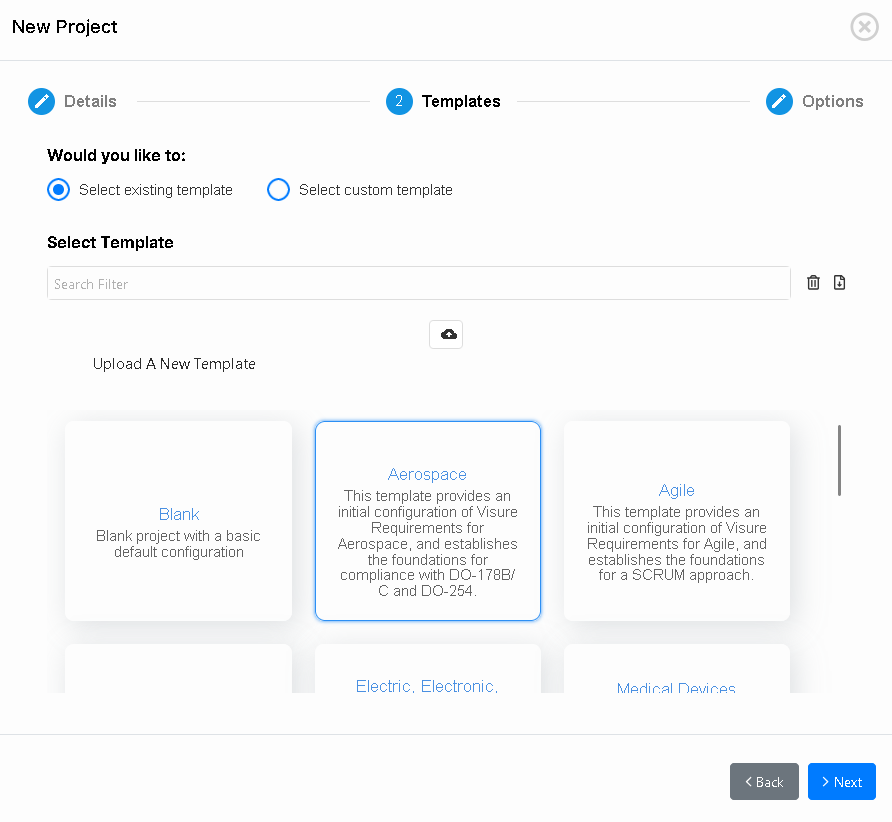
In this step, you will also be able to:
- Upload new templates by drag and dropping *.ipt (Visure project template file extension) files on top of the Upload a new templates section , or clicking on it to select it from the local drive.
- Download existing templates by selecting them and clicking on the Download template icon.
- Delete obsolete templates by selecting the corresponding template and clicking on the delete icon.


Users may also select to use custom templates. Using a custom template will create the new project out of the selected template, but it will not upload the template to the list and will not make it available to the rest of the users, unless, the option “Save template to the default list of templates for new projects” is selected.
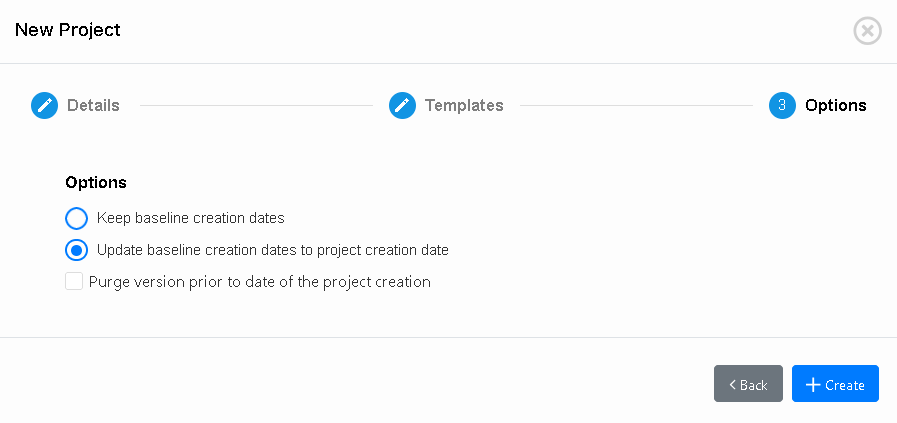
Step 3: Configure options
This step will allow you to control several aspects of the import process. In particular:
- Baseline dates:
- Keep baseline creation dates: This option will keep the original dates as in the selected template. For instance, if a baseline was created in the original project several years ago, it’ll appear as such in the projects that use this template.
- Update baseline creation dates to project creation date: In this other case, baseline dates will be updated to match the day on which the new project is created.
- Purge versions prior to date of project creation: If you select this option, Visure will automatically delete all intermediate versions of items that do not belong to a baseline.